
Search Documentation
Search across all documentation pages, APIs and guides.
Merchant Onboarding
Everything you need to create your OnePay account, configure your integration, and start accepting live payments on Sri Lanka's leading ISO 27001 certified payment gateway.
Phase 1 — Account Setup
Set Your Password
You will receive an email from noreply@onepay.lk to complete your merchant registration. Check your spam folder if you do not see it in your inbox. Click "Click Here" in the email to set your password.
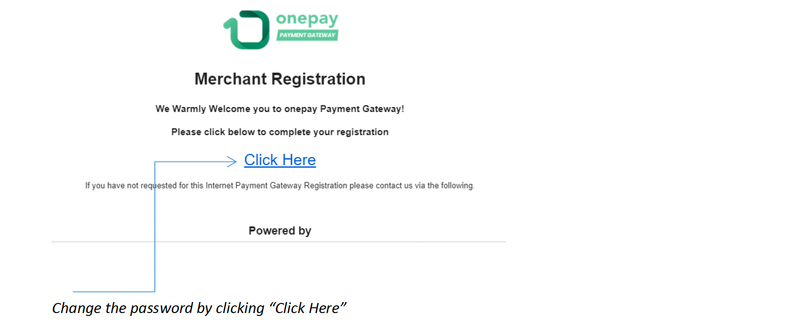 Registration Email Screenshot (Replace with screenshot showing the 'Click Here' email)
Your password must meet the following requirements:
- 8 to 128 characters
- One uppercase letter (A–Z)
- One lowercase letter (a–z)
- One number (0–9)
- One special character
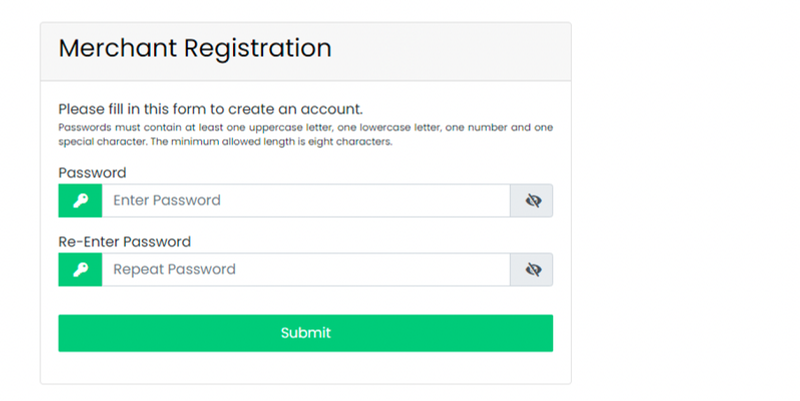 Password Setup Screen (Replace with the Merchant Registration password form screenshot)
Enter your password, confirm it, and click Submit to complete the registration step.
Go to the OnePay Website
Visit the OnePay website to access the merchant portal login page.
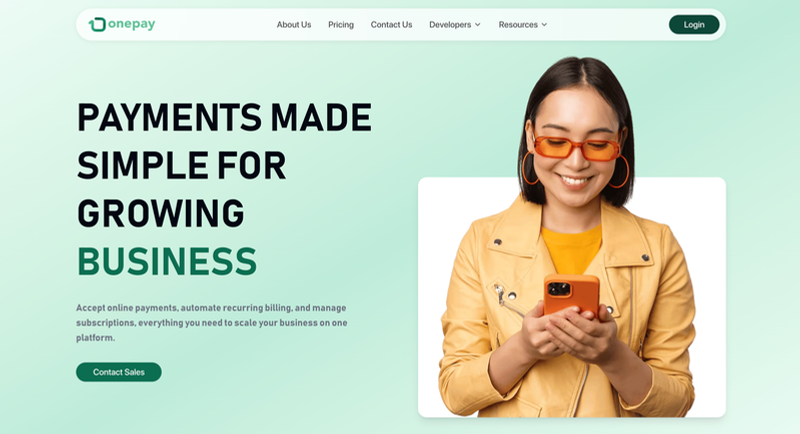 OnePay Homepage — 'Payments Made Simple for Growing Business'Bookmark onepay.lk for quick access to your merchant portal at any time.
Log In to the Merchant Portal
Enter your registered User Email and the Password you set in Step 2. Click the Login button to enter your dashboard.
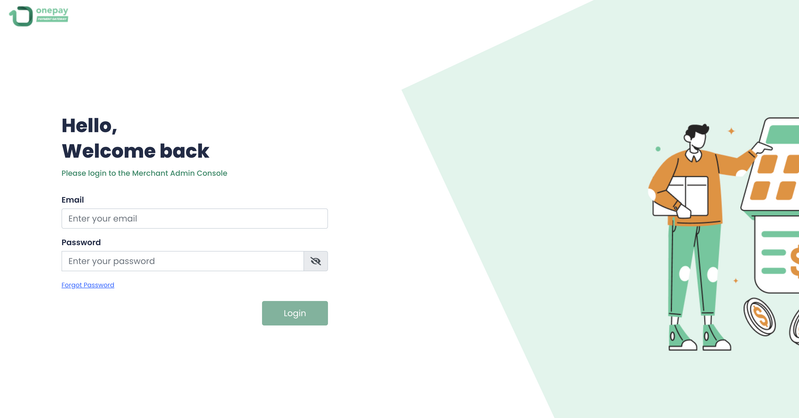 Merchant Portal Login Screen (Replace with login page screenshot)
- Enter your Email here
- Enter your Password here
- Click Login
Use Forgot Password on the login screen if you need to reset your credentials at any time.
Phase 2 — Developer Configuration
Merchant Dashboard Overview
After logging in, you will land on the Overview dashboard. Key metrics are visible at a glance:
- Transaction Volumes
- Recent Transaction
- Today's Sales
- Last Payout
- Pending Payout
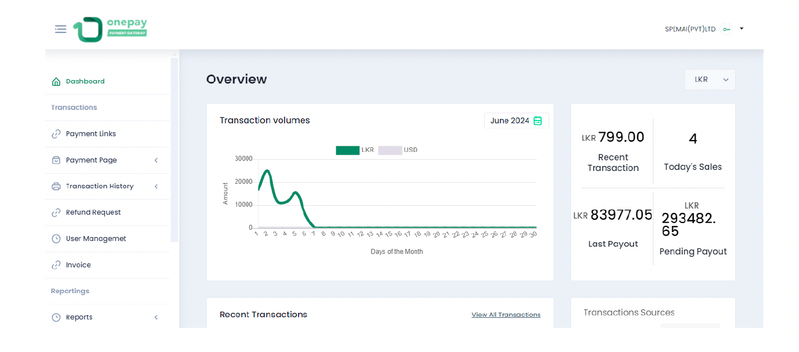 Merchant Dashboard Overview Screenshot
Navigate to Developer Configurations
Scroll down in the left sidebar and click Developer Configurations to expand the section. Then click IPG Apps from the sub-menu.
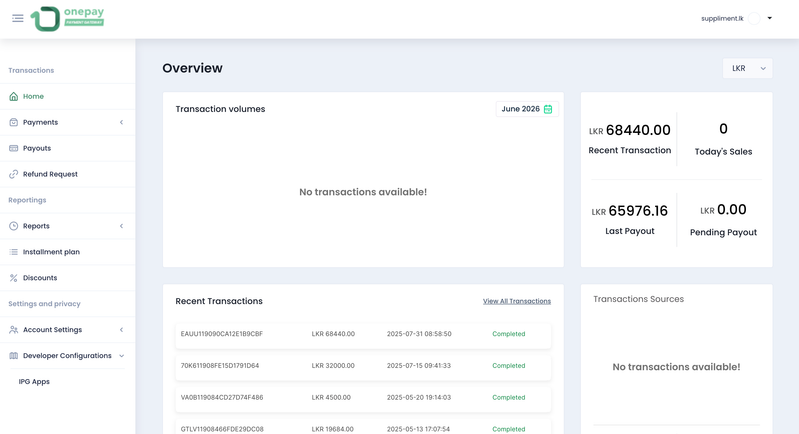 Left Sidebar — Developer Configurations Expanded
Update Developer Details
In the IPG Apps section, fill in your developer profile fields and click Update to save.
- Developer Name
- Developer Email
- Developer Phone
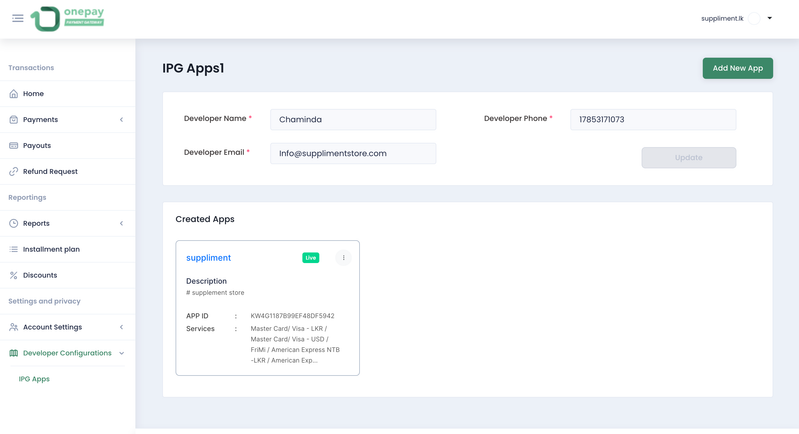 IPG Apps — Developer Details Form
Phase 3 — App Creation and Configuration
Add a New App
Click the Add New App button in the top right of the IPG Apps section. A dialog will appear to configure your integration.
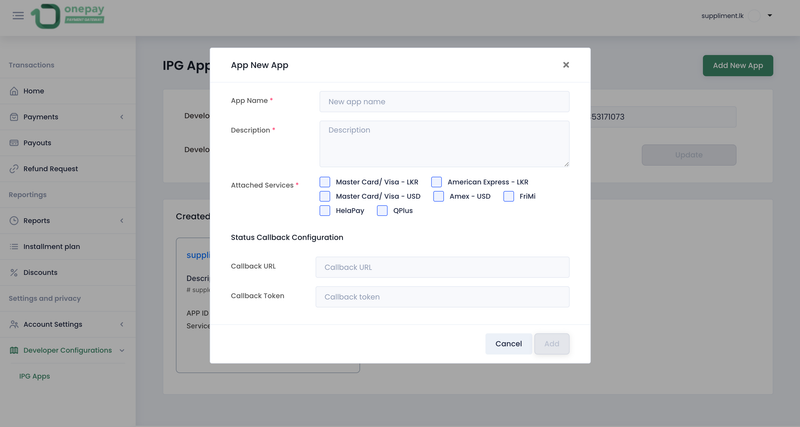 IPG Apps — Add New App Button
Configure the New App
In the "App New App" dialog, complete the following fields: App Name, Description, and select all payment services your integration requires.
- Mastercard / Visa LKR
- Mastercard / Visa USD
- American Express LKR
- FriMi
- HelaPay
- QPlus
 App New App Dialog — Full Form
Set Callback URL and Token
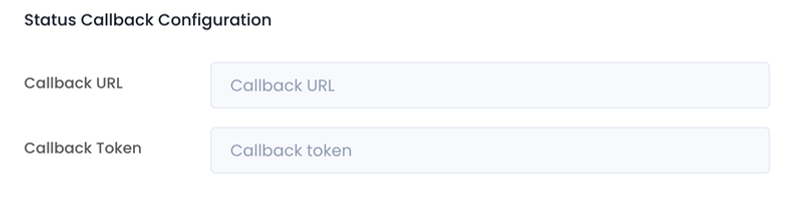
Under Status Callback Configuration, provide the two values that let OnePay communicate payment results to your system:
URL — the endpoint on your server that receives payment status notifications (e.g.https://yoursite.lk/payment/callback)Callback Token — a secret key to validate that incoming callbacks are genuinely from OnePay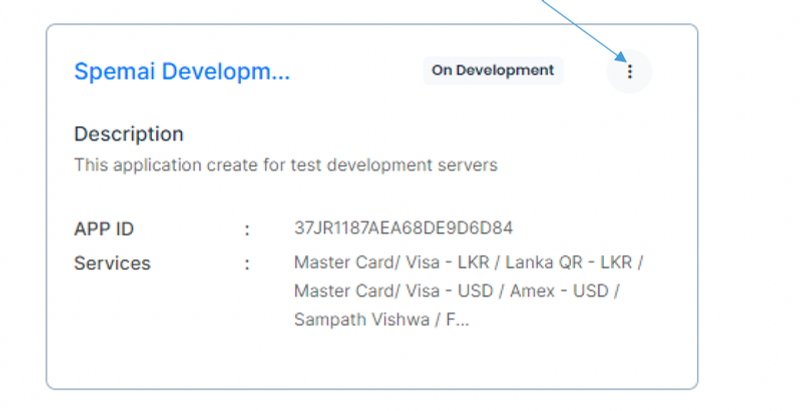 Status Callback Configuration Section
Submit the App
Click Add to create the app. It appears in your IPG Apps list with status On Development. Click the three-dot menu (⋮) on the app card to access:
- View — App ID, Token, Hash Salt
- Update — Modify app settings
- Deactivate — Disable the app
- Request to go Live
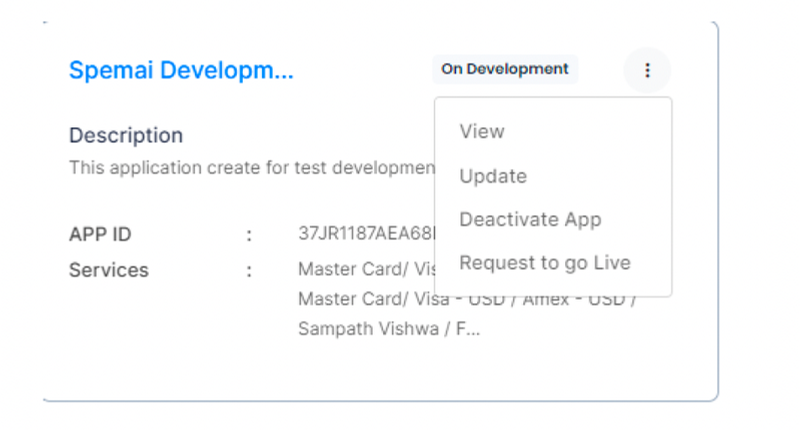 App Card — 'On Development' Status with Three-Dot MenuClick View to retrieve the App ID and App Token needed for API integration in your codebase.
Phase 4 — Go Live Approval
Request to Go Live
Once your integration and testing are complete, open the three-dot menu on your app card and select Request to go Live.
In the dialog, enter a star (*) in the CIDR permission field to allow all IP addresses, or enter specific IPs for tighter security control.
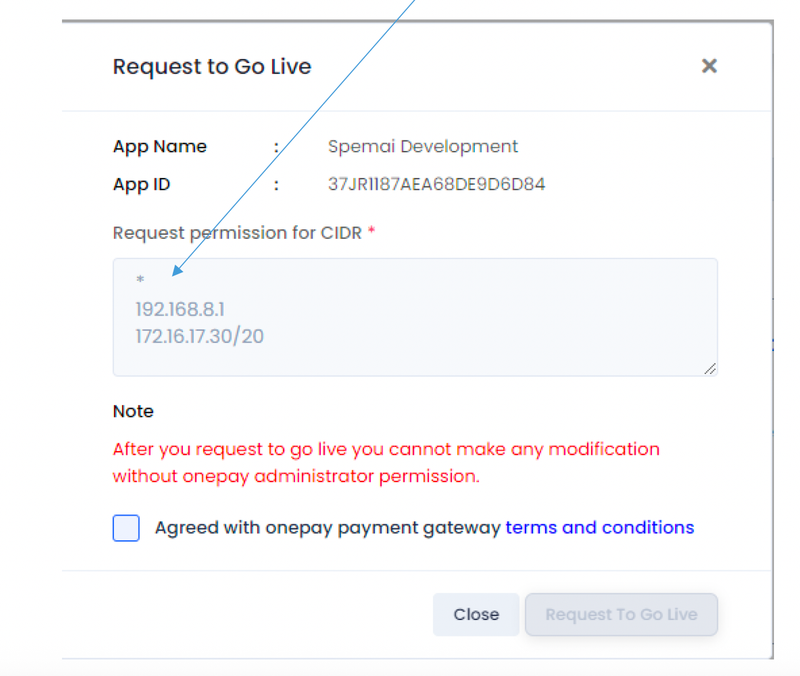 'Request to Go Live' DialogAfter you request to go live, you cannot modify the app without OnePay administrator permission.
Agree and Submit
Check the box to agree with the OnePay Payment Gateway Terms and Conditions. Click Request To Go Live.
Your app status will update. The OnePay team will review and approve your request.
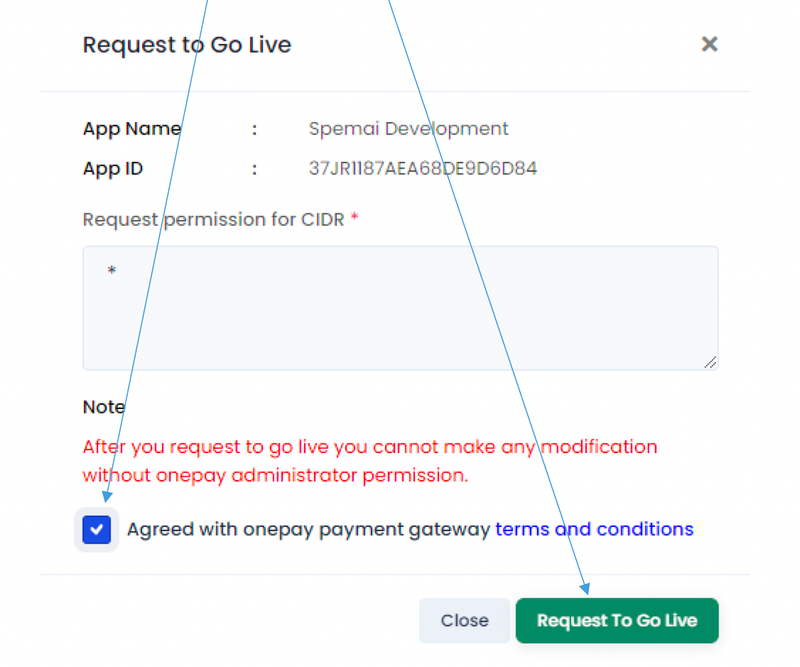 Terms Checkbox and 'Request To Go Live' ButtonOn Development→Pending Approval→LiveOnce approved, your integration is live and ready to process real payments. Maximum turnaround is 3 working days.
How to Upgrade Your Package
Go to Account Settings
From the main dashboard, scroll down the left sidebar and click Account Settings.
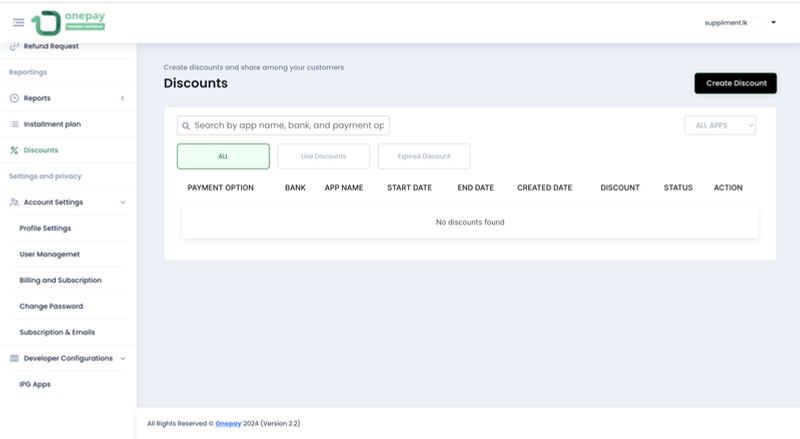 Account Settings Sidebar
Open Billing and Subscription
Under Account Settings, click Billing and Subscription.
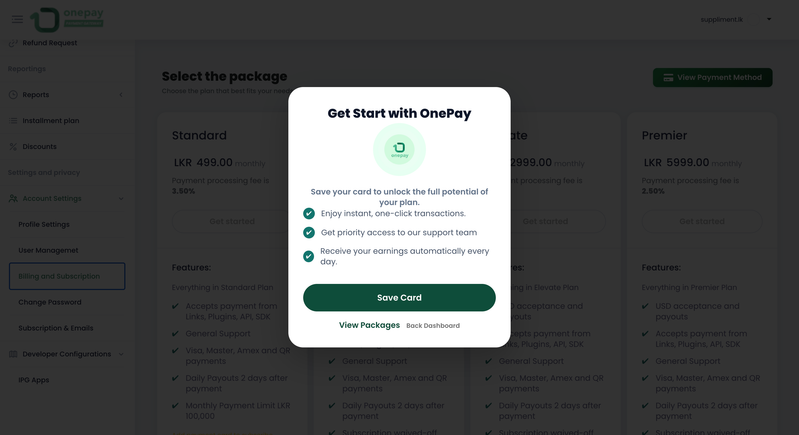 Billing and Subscription Menu
Update Payment Card Details
Provide your card details so they can be securely tokenised for automated subscription payments.
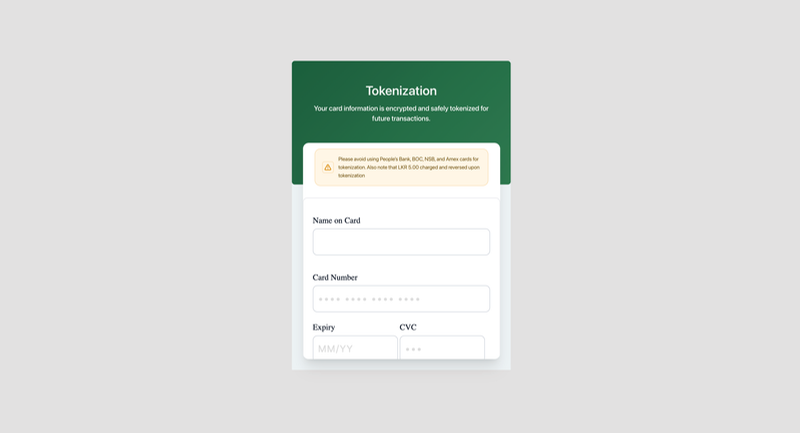 Update Payment Card Details FormThe tokenization flow will prompt you to save your card securely. Please avoid using People's Bank, BOC, NSB, or Amex cards for tokenization. A nominal LKR 5.00 charge is made and reversed upon completion.
Select a Package
Choose the plan that best fits your business and click the Get Started button.
StandardLKR 499/mo3.50% processing fee- Visa, Master, Amex, QR
- General Support
- Daily Payouts T+2
- Monthly limit 100K
EssentialLKR 799/mo3.25% processing fee- USD acceptance + payouts
- Visa, Master, Amex, QR
- Daily Payouts T+2
- Limit waived to 500K
ElevateLKR 2,999/mo2.75% processing fee- USD acceptance + payouts
- Visa, Master, Amex, QR
- Daily Payouts T+2
- Limit waived to 2M
PremierLKR 5,999/mo2.50% processing fee- USD acceptance + payouts
- Visa, Master, Amex, QR
- Daily Payouts T+2
- Limit waived to 3M
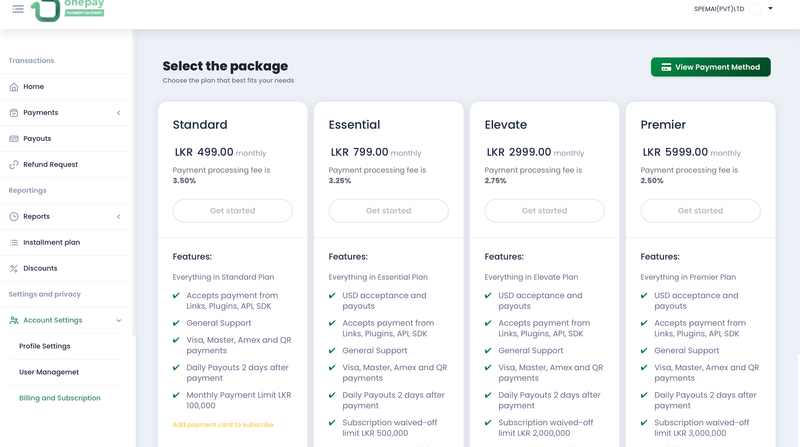 Billing and Subscription — Package Selection Page
On This Page